Connecting the AI Agent
EveryoneAsk the built-in assistant, or let Claude, ChatGPT or another client read and act on your RFQs and quotations, within your role.
What it does
The AI Agent lets an assistant such as Claude or ChatGPT answer questions about your RFQs, costing, quotations, parts, customers, tasks, tickets, drawings and 3D models, and make the changes your role allows. Open AI Agent in the app to find the address and set up a connection.
You add the connector in your client. The client asks the RFQ system to connect, and you sign in and choose Allow. The client then has access for your account. When you ask a question, the client calls the RFQ system with your access and receives only what your role can see, then answers you. Before any change, the client asks you first.
The built-in assistant
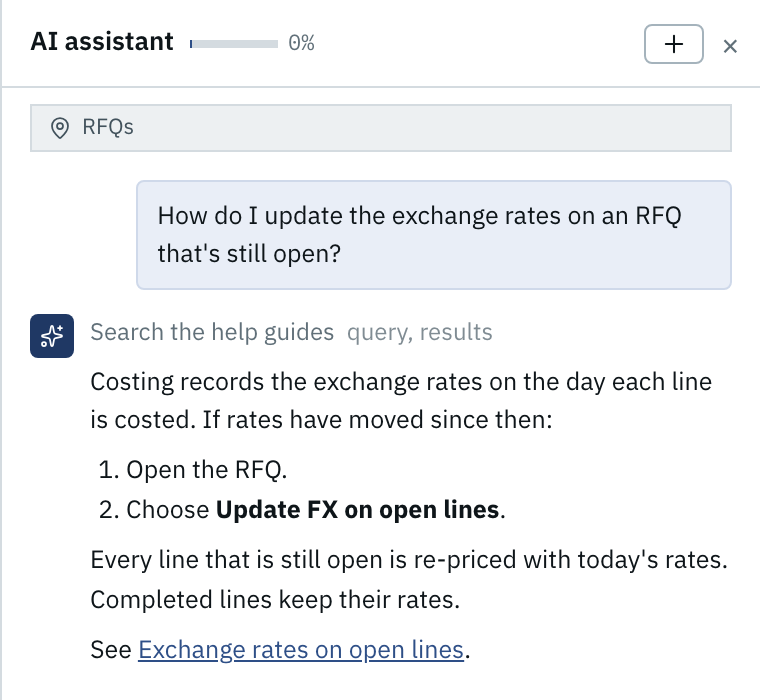
Choose Ask AI in the top bar, or press Ctrl J (⌘ J on Mac), to open the assistant beside the page. It knows which page you have open, looks things up with the same tools a connected client gets, and can open pages, fill in forms and look at drawings and 3D models for you.
- Replies can include tables, links to records, pictures, PDFs and 3D models you can rotate and zoom. PDFs, models and other files have a Download button; see Files and downloads.
- Each lookup or action shows as a quiet grey line above the answer, such as Search the help guides or Go to a page, opened /audit, so you can see what it did without the detail getting in the way.
- With a 3D model open in costing, ask it to work the viewer for you: turn, zoom or pan the view, zoom to a part, hide or isolate parts, change the model colour, size the stock with per-face allowances, cut a cross section, or save the view as a PNG. These are view settings, so it makes them straight away without asking.
- Before it saves, submits, approves or changes anything, it shows what it wants to do and waits for Allow or Deny. Allow for this chat stops it asking again for that kind of change until you start a new chat or reload the page. Voiding, rejecting and other changes that undo work always ask.
- Attach PDF, Excel (.xlsx), CSV, Word (.docx), Markdown, text, PNG, JPEG, STEP or IGES files with the paperclip, by dragging them onto the panel, or by pasting. Up to 10 files of 20 MB each per message. Files are read in your browser and aren't saved in the app.
- The bar in the header shows how much of the conversation the model can still take in.
- The assistant searches these guides when it isn't sure how something works, and answers how-to questions with a link to the section it used. It reads live facts, such as statuses and prices, from the data instead.
- If something goes wrong, the reply says what happened and offers Try again; see When the assistant can't answer.
- Your conversation is kept on your account. It is still there after you reload the page or sign in on another computer, until you choose New chat. It is also cleared if your role changes.
- Files you attached aren't kept with the conversation. After a reload, attach a file again if you want the assistant to read it.
Files and downloads
When the assistant shows a PDF, drawing, picture or 3D model in the chat, the viewer has a Download button that saves the original file. Other files appear as a link with the same button.
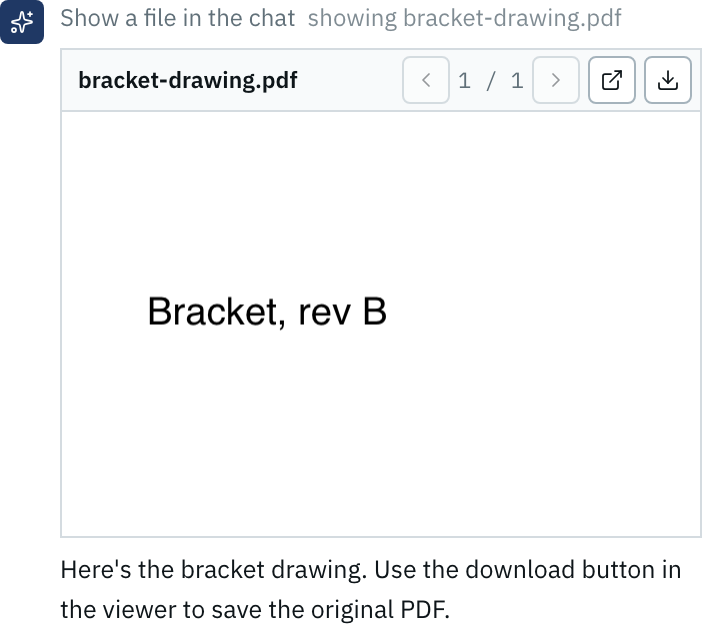
- Files you attach are read in your browser and aren't saved in the app. Files the assistant shows from the app, such as a line's drawing or a quotation PDF, download with the access you already have.
- Connected apps such as Claude or ChatGPT can't open files inside the app, so when they look up a drawing, a 3D model or a quotation PDF they also get a download link they can give you.
- A download link works for 15 minutes and doesn't need you to sign in. It is checked again when you use it: it stops working if you lose access to the file, your account is deactivated, or you disconnect the app or revoke its token.
- When a link has expired, ask the app for the file again to get a new one. The built-in assistant only gives you a link if you ask for one; otherwise it shows the file in the chat.
When the assistant can't answer
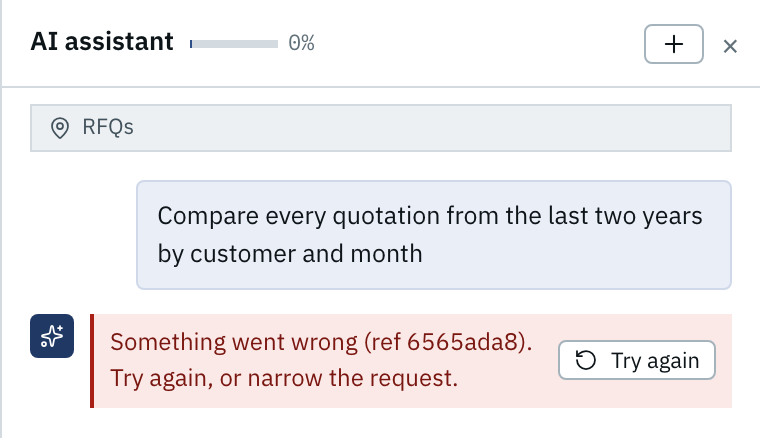
When the assistant can't answer, the reply ends with a red message saying why. Most can be fixed with Try again, which sends your last message once more without repeating it in the chat.
Lost the connection to the app…
- Your network dropped while it was answering. Check the connection and try again.
The answer stopped unexpectedly.
- The reply was cut off part way. Try again.
OpenAI rate limit or quota reached…
- Too many requests, or the OpenAI account is out of credit. Wait a minute and try again; if it keeps happening, an administrator should check the account's billing.
OpenAI is having trouble right now…
- A problem on OpenAI's side. Try again shortly.
OpenAI took too long to answer.
- Try again, or ask for less at once.
This chat is too long for the model. Start a new chat.
- Choose New chat and ask again; the bar in the header shows how full the chat is.
OpenAI refused this request…
- Rephrase the request, or start a new chat.
The built-in assistant has no API key…
- It is turned on but has no OpenAI key. An administrator adds one from the cog on the AI Agent page.
The built-in assistant is off…
- An administrator turns it on from the cog on the AI Agent page.
The assistant is already answering in another tab or window.
- Wait for that answer to finish, or stop it, then send again.
Something went wrong (ref ab12cd34)…
- An unexpected error. Try again, or narrow the request. If it keeps happening, give the reference to an administrator so they can look into it.
Messages about the API key or the model name, such as OpenAI rejected the API key.
, are for administrators; see Setting up the built-in assistant.
Setting up the built-in assistant
Administrators set up the built-in assistant from the cog next to the page title on the AI Agent page. Everyone else sees whether it is on and which model it uses.
- Turn on
- Makes the assistant live for every user.
- API key
- An OpenAI API key. It is stored encrypted and never shown again; only its last four characters are. Without one, the assistant uses the key set up when the system was installed.
- Model
- gpt-5.6-luna by default. The larger terra and sol models are slower and cost more.
- Reasoning effort
- How long the model thinks before answering. Low suits most questions.
- Max output tokens
- The longest a single reply can be.
- Context window
- How much of the conversation the model can take in; older pictures and tool results are shortened near the limit.
- Max tool rounds
- How many rounds of lookups one message can use before the assistant stops and summarises.
- Max tool result size
- Longer tool results are cut, so one large list can't crowd out the rest.
- Allow page tools
- Lets the assistant navigate, fill in forms and click on the page.
Test connection makes one tiny request to check the key and model before you save.
Connect claude.ai
For Claude on the web, no token is needed:
- In Claude, open Settings, then Connectors, then Add custom connector.
- Paste the Data server address from the AI Agent page as the URL. It ends in
/api/mcp/data. Leave OAuth Client ID and OAuth Client Secret blank. - Click Connect. Sign in to the RFQ system if asked. Under Name this connection, keep the suggested name, such as Claude (claude.ai), Chrome on macOS, or type your own, then choose Allow.
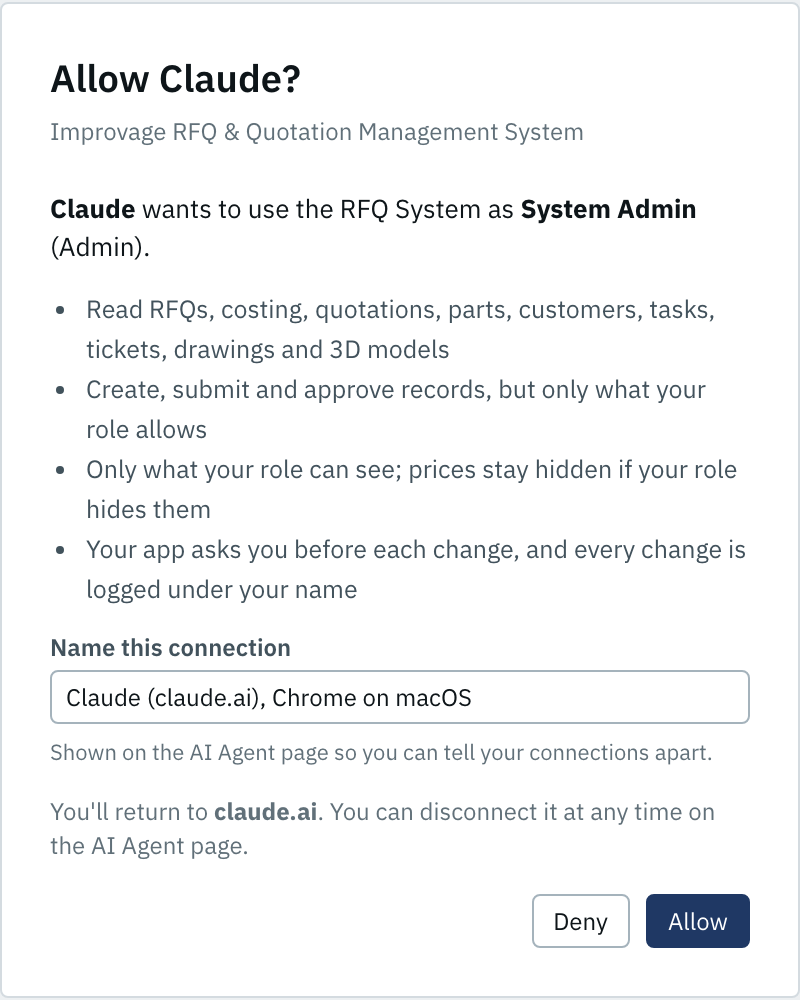
The connection is listed by that name under Signed-in apps on the AI Agent page, with the app it came from underneath. See Naming and managing connections.
Connect ChatGPT
ChatGPT on the web also connects by signing in, with no token:
- In ChatGPT, open Plugins, then Add, then New Plugin.
- Give it a name, paste the Data server address from the AI Agent page as the server URL, and set Authentication to OAuth.
- Leave registration on Dynamic Client Registration. A notice that CIMD is unavailable is expected and can be ignored.
- Tick I understand and want to continue, click Create, sign in to the RFQ system if asked, name the connection, then choose Allow.
The connection is listed by that name under Signed-in apps on the AI Agent page, where you can rename it. See Naming and managing connections.
Naming and managing connections
Claude, ChatGPT and other apps all introduce themselves with just their name, so two connections from the same app would look alike. When you choose Allow, you name the connection; the name is what you see on the AI Agent page and in the audit log.
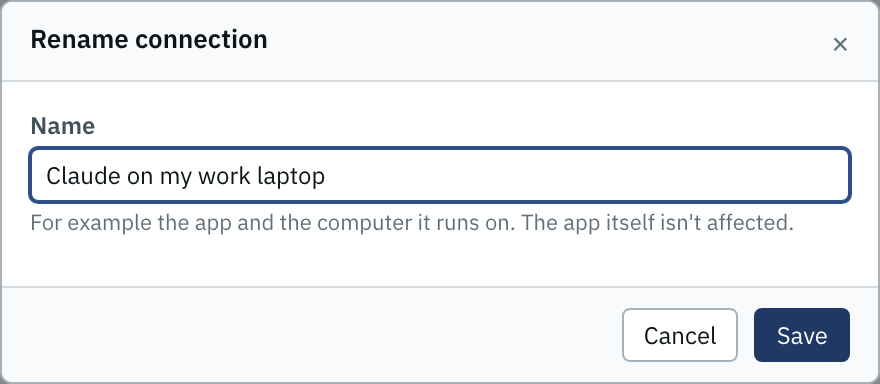
- The suggested name says where the app connects from and what you allowed it on: for example Claude (claude.ai), Chrome on macOS, ChatGPT web, Safari on iPhone, or Claude Code (desktop app) for apps that sign in through your own computer. Keep it, or type something you'll recognise, such as Claude on my work laptop.
- Under Signed-in apps, each connection shows its name with via and the app's own name underneath, when it was connected, and when it was last used.
- Choose Rename to change the name at any time. Renaming doesn't affect the app; it keeps working. The change is written to the audit log. Access tokens can be renamed the same way.
- Signing in again from the same app replaces its old connection, so you don't collect duplicates. Each person's connections are their own; nobody else sees or manages them.

Connect with a token
Cursor, Claude Desktop and other clients use a personal access token.
- On the AI Agent page, under Access tokens, name the token and choose when it expires: in 30 days, in 90 days, or never.
- Copy the token. It starts with
rfqa_and is shown only once. - On the same page, open the guide for your client and copy its ready-made snippet; the token is already filled in. The guides start folded, so click a client's name to open it.
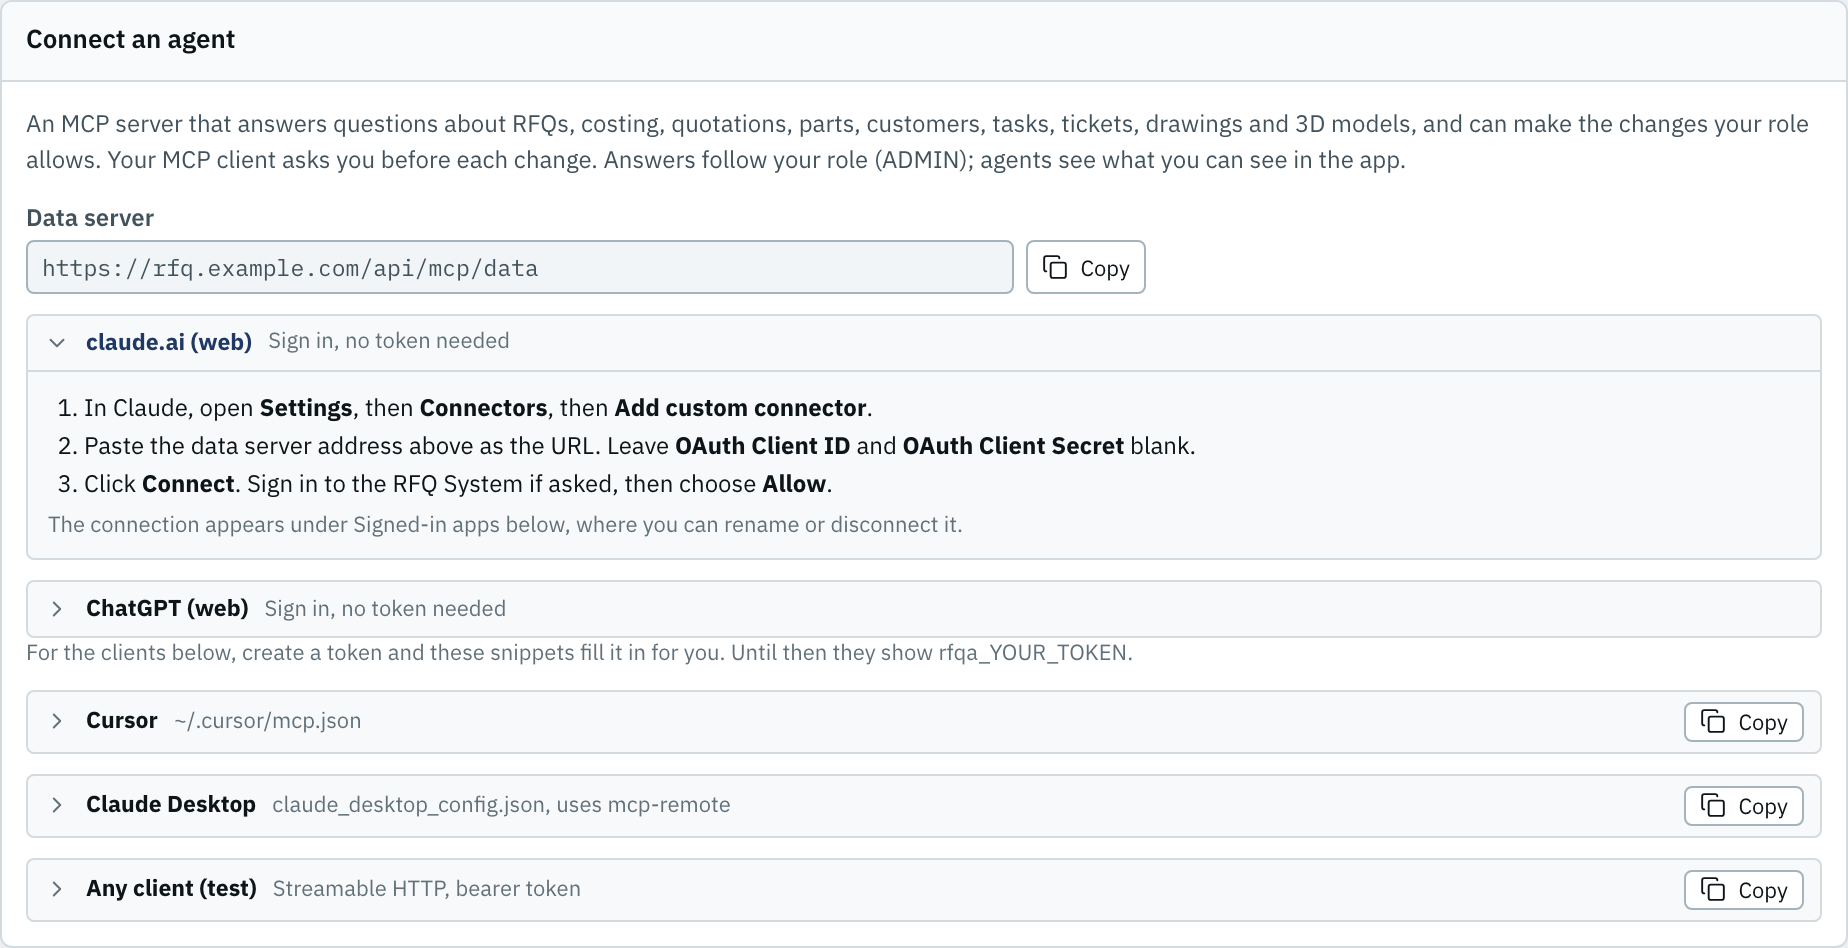
For Cursor the snippet goes in ~/.cursor/mcp.json and looks like this:
{
  "mcpServers": {
    "rfq-data": {
      "url": "https://<your RFQ system>/api/mcp/data",
      "headers": { "Authorization": "Bearer rfqa_…" }
    }
  }
}
Claude Desktop uses claude_desktop_config.json and a small helper called mcp-remote; the page gives you the exact text.
What it can see and do
What the AI Agent can see and do is the same for the built-in assistant and for connected apps, and always follows your role.
- The assistant acts as you, with your current role. If your role changes, so does what it can do.
- Viewers never get prices, costs or totals in any answer.
- Your client asks you before each change it makes.
- Drawings, 3D models and quotation PDFs it looks up come with a download link your client can show you. The link works for 15 minutes without signing in, and stops working sooner if you lose access to the file or disconnect the client.
- Read
- Search, list and open RFQs, lines and costing, quotations, parts, customers, tasks, tickets, notifications and master data; read drawings and 3D model details; see the Overview and Analytics figures.
- Help
- Search and read these guides and What's new, so it can answer how-to questions and link you to the right section.
- Files
- Show drawings, 3D models and quotation PDFs, and hand you a 15-minute download link for them; see Files and downloads.
- Check first
- Ask whether an RFQ or quotation can be submitted, approved or closed out, whether a part number or customer already exists, or what a currency converts to, without changing anything.
- Change
- For example create an RFQ, submit it, update FX, duplicate a quotation, apply the customer profile, approve a quotation, validate a part, record a quotation outcome, add an FX rate, or raise a ticket, if your role allows it. Merging and deactivating records stay in the app.
Revoking access
- On the AI Agent page, choose Revoke next to a token, or Disconnect next to a signed-in app, and confirm. It stops working straight away, and so do any download links it handed out.
- Expired and revoked tokens stay in the list so you can see what was used.